Deploying an App from TIBCO Business Studio™ for BusinessWorks™
The following is a tutorial on using TIBCO Business Studio for BusinessWorks to generate deployment archives for a TIBCO BusinessWorks™ App and push the app to the cloud.
There are two possible scenarios for deployment:
- Deployment archives, which include an EAR archive and optionally a JSON manifest, can be exported from TIBCO Business Studio for BusinessWorks. This is typically done when a developer is providing archives to a DevOps administrator for later deployment to the cloud using the TIBCO Cloud™ Integration web page or TIBCO Cloud™ - Command Line Interface.
- The app can be deployed to the cloud from within TIBCO Business Studio for BusinessWorks. This is typically done when a developer is continuously making changes and testing them in the cloud.
In this tutorial, we will create an EAR archive for the PetStore app included in TIBCO Business Studio for BusinessWorks.
- To begin using TIBCO Cloud Integration, you must register an account. See Registering a TIBCO Cloud™ Integration Account for more details.
- If you have not done so, install TIBCO Business Studio for BusinessWorks on your computer. See Installing TIBCO Business Studio™ for BusinessWorks™ for more details.
- Open TIBCO Business Studio for BusinessWorks. On the Workspace Launcher dialog, accept the default workspace or browse to create a new workspace, and then click OK. TIBCO Business Studio for BusinessWorks is started and the default development environment, called a workbench, appears.
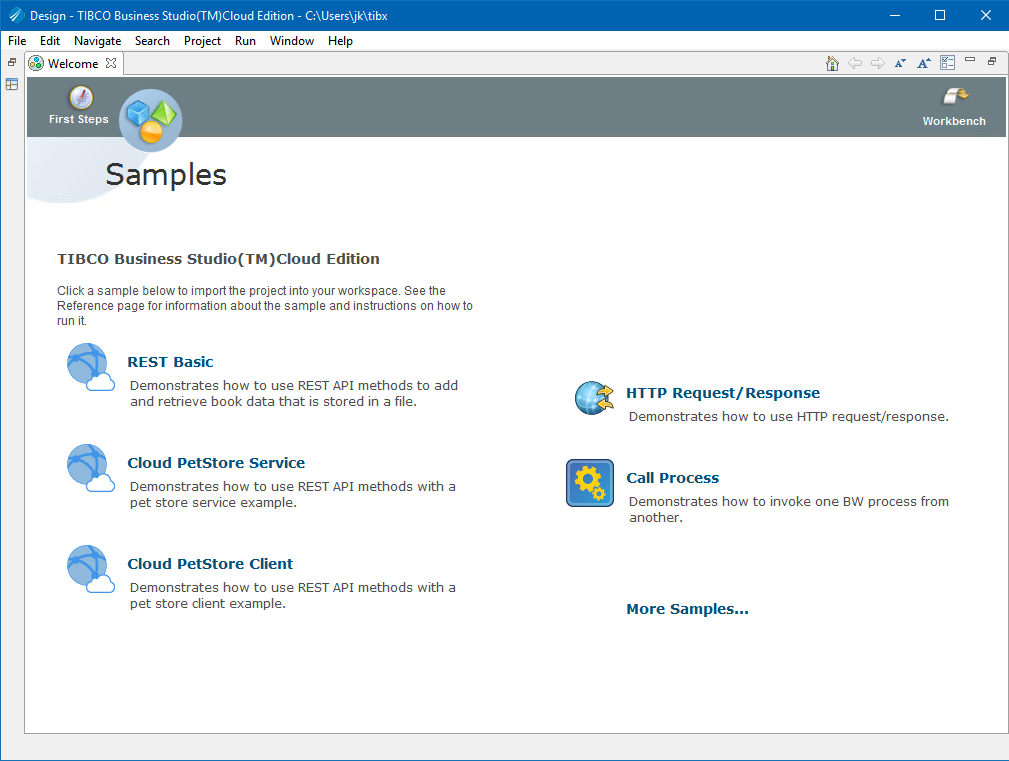
- By default, you see a Samples window. If you do not, select Help > BusinessWorks Samples.
- Click Cloud PetStore Service to import the PetStore sample app into your workspace.
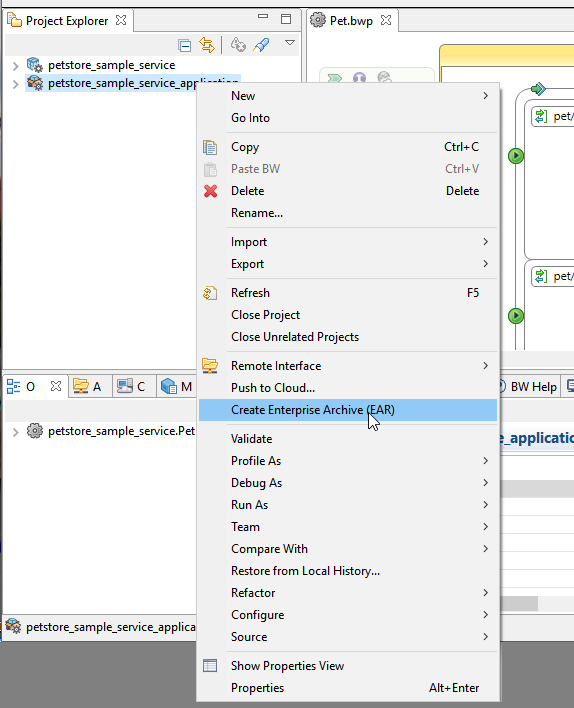
- In the Project Explorer, right-click
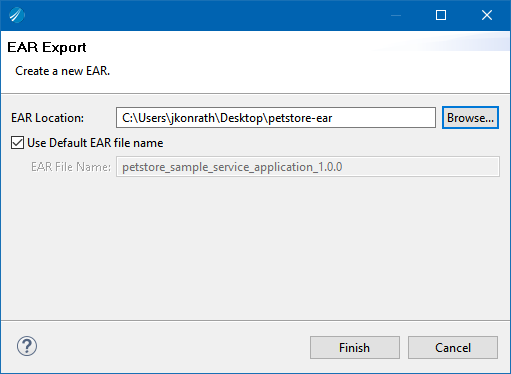
petstore_sample_service_applicationand select Generate Enterprise Archive (EAR). The EAR Export window appears. - Enter an EAR Location. Click Browse to change the location. This creates a directory to contain the EAR archive.
- If you wish to change the name of the EAR archive, clear the Use Default EAR file name option and enter a new name.
- Click Finish. The EAR file is created in the named directory. The deployment archive can now be pushed manually to the cloud at the TIBCO Cloud Integration web page, or by using the TIBCO Cloud™ - Command Line Interface.
You can also push the app to the cloud directly from TIBCO Business Studio for BusinessWorks.
- Go to API Explorer, click the down arrow in the upper right corner, and click Settings.
- Select the
CloudAPI registry configuration, and click Edit. - On the Basic tab, enter your username and password.
- On the Accounts tab, select an account organization.
- Click Finish, then click Close.
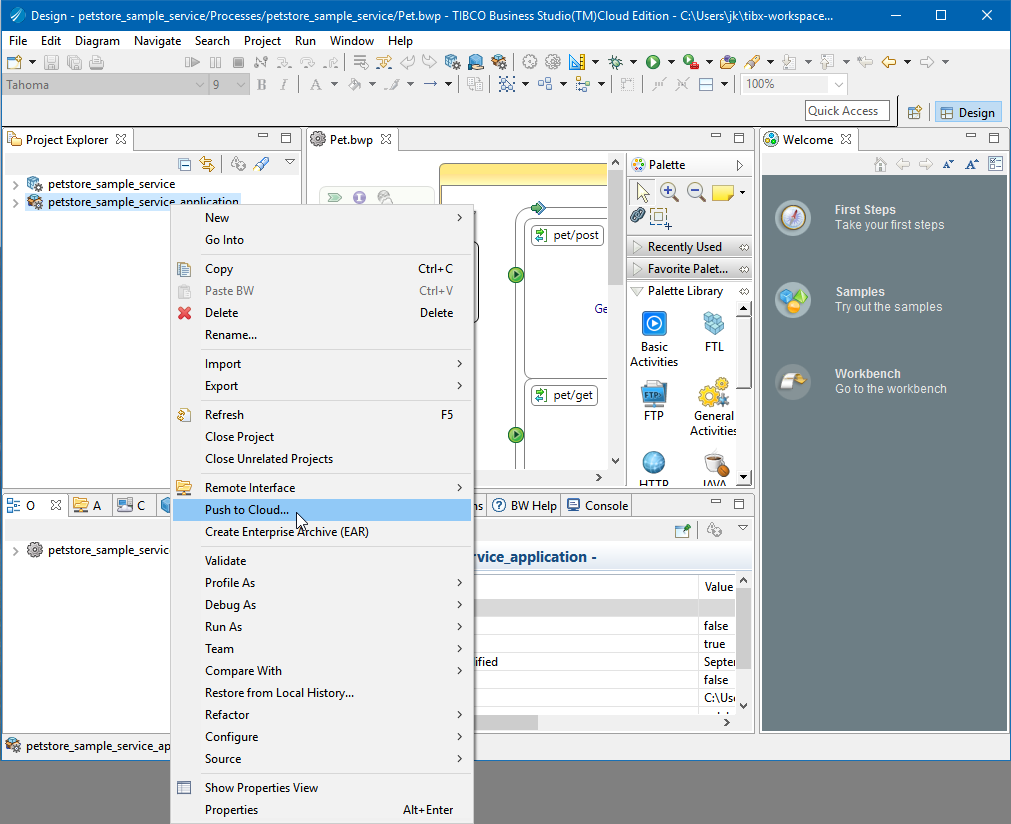
- In the Project Explorer, right-click
petstore_sample_service_applicationand select Push to Cloud. Your app is pushed to the cloud in your account.


